In my experience working with Excel, I’ve found that using VBA (Visual Basic for Applications) to insert rows and columns can be a real time-saver. You may know that Excel allows you to add rows and columns manually, but what if you have to perform this task over and over, or across multiple sheets? That’s where writing a macro can make a difference. Not only does it speed up the process, but it also helps to maintain consistency in your data manipulation tasks.
My journey with VBA in Excel has taught me a variety of ways to automate the insertion of rows and columns. Whether it’s about inserting a single row based on specific cell text, adding multiple rows, or even inserting a whole column—hearing about ‘Column A’ nightmares are all too common—VBA can handle it all. Once you get the hang of these macros, you’ll see how they can open up a whole new world of efficiency for you.
Insert a Single Row using VBA
In working with Excel VBA, sometimes I need to quickly add a single row into my worksheets. It’s a simple process with the VBA macro. Here’s how I do it:
-
I determine which row will come before the new one by selecting a cell in that row. For example, if I select cell “A1,” my new row will be inserted above the first row.
-
To reference the whole row, I use the
.EntireRowproperty. This is really handy because it gives me control over the complete row, not just the single cell I’ve selected. -
Then, I simply append
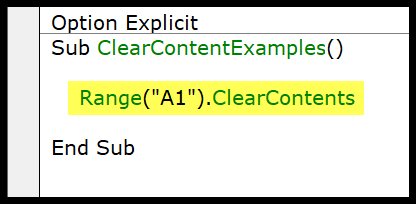
.Insertto put the new row in place. The VBA line looks like this:Range("A1").EntireRow.Insert
When I execute the macro with the above code, VBA slides in a new row right above the cell I targeted, which in my example is above the first row. I always make sure I’ve turned off Application.ScreenUpdating if I’m running this inside a loop to keep things looking clean and speed up the macro. And just like that, the worksheet updates with a new row where I need it.
Insert Multiple Rows
When I’m working with Excel, I often need to add multiple new rows into a worksheet. It’s pretty straightforward. Let’s say I want to add 5 rows at a particular spot. I simply define the spot with a range, like this:
Sub InsertMultipleRowsExample()
    Range("5:9").EntireRow.Insert
End Sub
This macro, when run, will pop in five blank rows starting at row 5. But I’ll be honest; it’s a bit rigid because changing the number of rows means adjusting the range each time. Not ideal if I’m looking for flexibility.
Here’s a smoother way to do it:
Sub InsertFlexibleRows()
    Dim iRow As Long
    Dim iCount As Long
    Dim i As Long

    ' Ask how many rows to add and where to add them
    iCount = InputBox("How many rows do you want to add?")
    iRow = InputBox("After which row do you want to add new rows? (Enter the row number)")

    ' Insert rows in the specified location
    For i = 1 To iCount
        Rows(iRow + i - 1).EntireRow.Insert
    Next i
End Sub
This time I use a for loop. It’s much handier because it allows me to specify the number of rows and the starting point on the fly. I just enter the data into the prompts, and boom, the rows get added without further fuss.
Here’s a brief breakdown of how this works:
- For loop: Repeats the insertion as many times as I specify.
- Insert method: Adds the rows in the specified location.
- EntireRow: Targets the full row, not just a cell.
- InputBox: Collects my input for the number of rows (iCount) and where to start inserting (iRow).
Insert Rows Based on the Cell Values
I’ve set up a quick macro to add multiple rows into an Excel sheet based on specific cell values. Here’s a simple breakdown of how I manage this:
- Determine Quantity: I check cell A1 for how many rows I need to insert.
- Find Insertion Point: Cell B1 tells me the starting point for the new rows.
- Setup Loop: I use a For loop, iterating from 1 to the quantity specified.
- Insert Rows: The EntireRow.Insert method adds the new rows at the desired location.
It’s straightforward but powerful, especially when dealing with dynamically sized data sets. Remember, the active cell isn’t used here; instead, the macro relies on predefined values from A1 and B1. No need to manually find the last row or deal with blank rows, the macro handles it based on the input.
Dim iRow As Long
Dim iCount As Long
Dim i As Long

iCount = Range("A1").Value
iRow = Range("B1").Value

For i = 1 To iCount
    Rows(iRow).EntireRow.Insert
Next i
Insert a Row without Formatting
' To insert a row without carrying over the existing formatting,
' simply follow these two steps:

' Step 1: Insert the new row
Rows(7).EntireRow.Insert

' Step 2: Clear formats from the newly inserted row
Rows(7).ClearFormats
In VBA, inserting a new row automatically copies the format from the row above unless specified otherwise. To maintain original styling, we use .ClearFormats right after insertion. Here’s the breakdown:
Rows(7).EntireRow.Insert: This adds a new row above row 7.Rows(7).ClearFormats: Ensures the new row doesn’t inherit formatting.
Insert Copied Row
Here’s how I copy a row in Excel using VBA:
Application.CutCopyMode = False
With Worksheets("Data")
    .Rows(5).Copy
    .Rows(9).Insert Shift:=xlShiftDown
End With
Application.CutCopyMode = True
This code first clears any previous copy state, then copies row 5 and inserts it above row 9. Remember to set CutCopyMode to True to enable copying. Check out more about VBA here.
Related Tutorials
I’ve been digging around and found some pretty handy tutorials that complement the advanced VBA strategies we’re tackling here.
- Here’s how to Count Rows using VBA—super useful if you’re juggling big datasets.
- Need to make your spreadsheet pretty? Excel VBA Font has got you covered for color, size, and bolding.
- Show or don’t show, that’s the question: Hide and Unhide columns or rows with ease.
- Manipulate spreadsheet cells like a pro with VBA Range.
- Borders in VBA can add that extra touch to stand out.
- Find the end of your data with Find Last Row, Column, and Cell.
- Combine cells with finesse using Merge Cells with VBA.
- Selecting cells is a breeze once you’ve checked out Select Range/Cell.
Remember, hitting Alt + F11 whisks you away to the Visual Basic Editor where all this magic happens. And if you’re trying to test a snippet of code, just press F5 to run the current subroutine in a flash.
Oh, by the way, I often use the Insert Column and Wrap Text features when my spreadsheets start getting unwieldy. These tricks have saved me loads of time when dealing with data:
Hit up these tutorials for more advanced maneuvers. Buoy up your Excel game even more with exercises involving Power Query or exploring different shortcut keys. Dive into creating a new module or mastering strategies for automating tedious tasks. It’s a game-changer.


