Excel’s Fill Handle is something I find incredibly useful for boosting productivity. It’s like a little magic trick hidden in plain sight; you just drag the corner of a selected cell, and voila! You’ve got a list that completes itself, whether with numbers, dates, or text patterns. It’s a real time-saver, helping turn what could be a monotonous task into a few seconds of click-and-drag action.
What I appreciate most about this tool is its versatility. Not only can it handle simple sequences like incrementing numbers or days of the week, but you can also introduce your own patterns or even create custom lists to auto-fill. Say goodbye to manual entry, because once you get the hang of using the Fill Handle, you’ll wonder how you ever managed without it.
Key Takeaways
- The Fill Handle in Excel allows for quick auto-completion of data series.
- It’s easy to use and can recognize patterns, including custom lists.
- If the Fill Handle isn’t visible, there are steps to make it appear.
What’s this Fill Handle in Excel?
I’ve noticed how Fill Handle in Excel is my go-to for speedy data entry. It’s fabulous for extending a series of dates, numbers, or even sales figures across multiple cells. Trust me, it’s a massive time-saver. Here’s a sneak peek into its benefits:
- Autocompletes lists effortlessly.
- Simply drag from one cell to adjacent cells.
- Excel recognizes patterns, like incrementing numbers or dates.
- Boosts my productivity with minimal effort.
Behold the power of Flash Fill for even greater efficiency!
How to Use Fill Handle in Excel?
When I’m working with Excel and need to create a series of values, the fill handle is my go-to tool. It’s super useful for auto-filling cells in a sequence, which saves me a bunch of time on data entry. Here’s how I use it:
- I click on the cell that has my starting value.
- Then, I move my cursor to the cell’s bottom-right corner, where I spot a tiny square—this is the fill handle.
- I click and drag this handle in the direction I need, whether it’s down rows or across columns.
- As soon as I release the mouse button, Excel magically fills in the cells with a sequence or copies the data, depending on what I started with.
And, if I’m filling numbers in a column and have data in the cell right next to it, I can just double-click the fill handle. It’ll automatically continue the series to match the length of the adjacent data. It’s like Excel reads my mind and knows exactly where to stop!
Pro tip: If I’m working with formulas and drag the fill handle, it adjusts the cell references in the formulas for me. Plus, if I need a quick autofill without dragging, I can select the range first and press Ctrl + D for filling down or Ctrl + R for filling right. Handy keyboard shortcuts, right?
Examples of Using Fill Handle in Excel
Autofill Numbers that Increment/Decrement by 1
I can quickly create a series of numbers in Excel that go up or down by 1. If I start with a number and drag the fill handle down, it fills the cells incrementing by one. Drastically, if I drag it up, the series decreases by one. Here’s a simple representation:
| Start | Direction | Result |
|---|---|---|
| 1 | Down | 2, 3, 4 |
| 5 | Up | 4, 3, 2 |

Autofill Weekday Names
When I want to fill in all the days of the week, I just type “Monday,” and by dragging the fill handle across, I get “Tuesday,” “Wednesday,” and so on. Excel recognizes both the short “Mon, Tue…” and full weekday names. After hitting “Sunday,” it loops back to “Monday.”

Autofill Dates
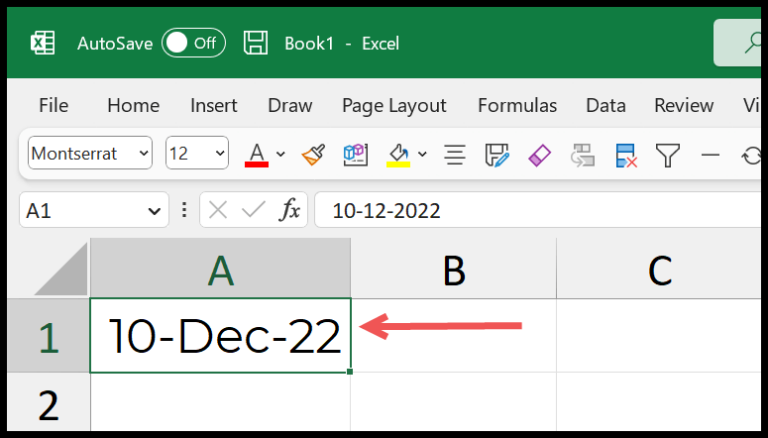
When I’m dealing with dates, be it days, months, or years, the fill handle is my time-saving buddy. Starting with any recognized date format, I extend the fill handle down or across, and lo and behold! The subsequent dates appear like magic.

Just by using the fill handle, I can auto-populate numbers, dates, and even text patterns. It reads my pattern and continue the series without skipping a beat.
Auto Fill Options
Autofill Options for a List with Numbers
When I drag the fill handle across a range to auto-populate a list with numbers, the Auto Fill Options icon pops up, offering several choices:
- Copy Cells: Just duplicates the initial cell’s content.
- Fill Series: Increases the numbers in the series typically by one.
- Fill Formatting Only: Applies only the original cell’s formatting to the new range.
- Fill Without Formatting: Copies the sequence but leaves formatting behind.
- Flash Fill: Excel identifies patterns from adjacent cells to complete the series intelligently.

Autofill Options for a List with Dates
Using the fill handle on dates offers me different functionalities to choose from, such as:
- Fill Days: Continuously fills in the subsequent days.
- Fill Weekdays: Skips weekends and only includes weekdays.
- Fill Months: Progresses the date by month, keeping the day constant.
- Fill Years: Increases the year while the month and day remain unchanged.

Autofill Options for a List with Day Names
When it comes to lists featuring weekdays, I get to use customized options that suit naming conventions:
- Fill Days: Fills in all seven days of the week continuously.
- Fill Weekdays: Omits weekends for a list that includes only Monday to Friday.

What if you can’t find the fill handle in Excel?
I noticed my fill handle was missing once, but getting it back was pretty straightforward. If it’s missing for you, just follow these steps:
-
I clicked File –> Options.
-
Navigated to Advanced from the sidebar. Here’s what it looks like:

-
Made sure to check the Enable fill handle and cell drag-and-drop box right in the Editing Options.

-
Hit OK, and just like that, my cursor showed a black box—presto, fill handle back in action!
Creating Custom Criteria for Autofill
To better tailor your Excel sheets, I find it useful to define my own patterns through custom lists. This simply means setting up a sequence that Excel recognizes and autofills according to your preference. Here’s how I get it done:
- Define Your Pattern: Decide the sequence, like a list of codes or full names, you’d like to autofill.
- Create a List: In an Excel column, type the series exactly as you want it to appear (A1 for instance), be it alphabets or any other type.
- Add to Custom Lists: Head to Excel Options and choose ‘Edit Custom Lists’ to import your list from the worksheet.
- Use as Needed: Now, whenever I start typing a list item, Excel suggests autofilling the rest for me.
And voila! Customizing data entry has never felt easier. It saves me a ton of time and avoids those pesky manual entries. Plus, I don’t have to worry about missing out on any element in my custom series. Excel’s got my back, and it can have yours too!


